Imagine hitting the open road in your recreational vehicle (RV), only to discover a hole in your aluminum siding from a minor accident. This scenario is more common than you might think.
Aluminum siding is renowned for its durability and resistance to the elements, but it is not invincible.
Factors such as collisions, tree falls, and general wear can compromise its integrity. The good news is that effective repairs can save RV owners significant costs compared to replacing entire panels.
In this guide, we will explore essential techniques for fixing aluminum siding, ranging from simple patches to complete panel replacements.
By drawing insights from real-world scenarios and expert recommendations, this article aims to empower RV owners to tackle siding repairs with confidence, preserving both the aesthetic appeal and functionality of their vehicles.
Table of Contents
- Understanding Aluminum Siding Damage
- Assessing the Damage: When to Repair or Replace
- DIY Repairs: Tools and Materials Needed
- Step-by-Step Guide to Patching Holes
- Replacing Damaged Panels: A Complete Guide
- Innovative Solutions for Large Damages
- Cost Analysis: Repairing vs. Replacing Aluminum Siding
- Preventative Measures: Maintenance of Aluminum Siding
- FAQ
Understanding Aluminum Siding Damage
Before diving into repair techniques, it is essential to understand how aluminum siding can sustain damage. Aluminum siding is strong, but it is not immune to various stressors, including collisions, environmental wear, and accidents.
When evaluating your RV’s siding, you may encounter different types of damage, including holes, dents, and corrosion.
Each type of damage can impact your repair strategy.
Types of Damage
The most common types of damage that aluminum siding can experience include:
- Holes: These can vary in size and severity, often resulting from impacts.
- Dents: Usually cosmetic, but deep dents can lead to water ingress.
- Corrosion: Often caused by environmental factors, leading to weakening of the material.
Common Causes of Damage
Understanding the typical culprits behind aluminum siding damage can help you identify how to address them effectively:
- Collisions: Minor accidents like bumping into another vehicle can create holes.
- Tree Falls: Falling branches can leave significant dents or punctures.
- Environmental Stressors: Sun exposure, rain, and extreme temperatures can wear down the material over time.
Real-Life Case Studies
Real-world scenarios can offer insight into the common challenges faced by RV owners. For example, a damaged aluminum siding from a minor collision with a truck may only require an epoxy patch if the hole is small.
However, in cases where the hole is extensive, simply patching may not provide sufficient durability.
As seen in community discussions, optimizing repair strategies is critical to maintaining your RV’s value.
This table outlines the types of damage, potential repair methods, and their estimated costs. By understanding these factors, RV owners can effectively budget and choose the right approach for their repairs.
Key Takeaways:
- Different types of damage require varying repair methods.
- Common causes include collisions and environmental stressors.
- Real-life scenarios highlight the importance of tailored repair strategies.
Assessing the Damage: When to Repair or Replace
Not all damage to aluminum siding is equal. Deciding whether to repair or replace the siding is crucial for optimizing your repair investment.
This process involves evaluating several factors, including the size of the damage, its location, and the overall condition of the siding.
Being able to discern when to opt for a quick repair versus a full panel replacement can save you a significant amount of money in the long run.
Criteria for Assessing Damage
Several criteria can assist RV owners in making informed decisions:
- Size of Damage: Smaller holes or dents are often easier and cheaper to repair, while larger impacts may necessitate panel replacement.
- Location: Damage on less visible areas might be repaired effectively without replacement.
- Condition of Existing Siding: Old, corroded siding may not support repairs poorly, calling for replacement instead.
Cost Considerations
Cost is a significant factor when weighing your options. As RV shop consultations often reveal, repair costs can vary widely:
- Hourly labor estimates range from 6-12 hours of work based on the repair’s complexity.
- Material costs can impact the overall expenses of both repairs and replacements.
When to Seek Professional Help
While many repairs can be DIY projects, knowing when to seek professional help is crucial. Some indications include:
- Widespread damage that requires expert evaluation.
- Inexperience with materials leading to potentially larger issues.
By weighing these factors, you can make a more informed decision on whether to repair or replace your siding.
Key Takeaways:
- Assessing the size, location, and condition of damage helps in decision-making.
- Cost variations can significantly influence repair versus replacement decisions.
- Professional help should be sought when repairs become complex or extensive.
DIY Repairs: Tools and Materials Needed
For the DIY enthusiasts, equipped with the right tools and materials is paramount for successful aluminum siding repair. This section covers the essential supplies needed, including caulks, adhesives, patch panels, and safety equipment, while also providing recommendations for quality products.
Essential Tools for Repair
Some of the most crucial tools include:
- Cordless Drill: Vital for removing panels and applying hardware.
- Utility Knife: Handy for cutting materials to size.
- Screwdriver Set: Necessary for removing and replacing screws.
- Rivet Gun: Used for securing patches or panels.
Choosing the Right Materials
Selecting the appropriate materials is equally important:
- Epoxy Adhesive: Ideal for patching small holes.
- Sheet Metal: Can serve as a patch for larger damages.
- Caulking: Essential for sealing gaps and ensuring watertight repairs.
Safety Precautions
When performing DIY repairs, safety should never be compromised:
- Protective Eyewear: To shield your eyes from debris.
- Gloves: For hand protection while handling tools and materials.
- Mask: Helpful when using strong adhesives or paints.
This table summarizes essential tools and materials needed for aluminum siding repairs. Remember that investing in quality tools can enhance the effectiveness of your repair efforts, ensuring longevity and durability.
Proper tools empower DIY repairs to be done effectively, equipping RV owners to maintain the integrity of their vehicles.
Key Takeaways:
- Key tools include drills, utility knives, and rivet guns.
- Selecting the right materials enhances the durability of repairs.
- Safety precautions are crucial for effective and risk-free repairs.
Step-by-Step Guide to Patching Holes
This section provides a comprehensive, step-by-step guide for patching holes in aluminum siding. Utilizing community-tested methods, you will learn how to effectively apply patches, ensuring a watertight seal and maintaining the structural integrity of your RV.
Preparing the Area for Repair
Start by cleaning the area around the hole to remove dirt and debris. This step ensures proper adhesion when applying the patch.
Use a utility knife to trim back any damaged edges around the hole.
Applying the Patch
Next, if using an epoxy patch, prepare it according to the manufacturer’s instructions. Apply a generous amount to the hole, ensuring that it fully covers the damaged area.
For larger holes, you may need to secure your patch with rivets to ensure durability.
Sealing and Finishing Touches
Once the patch is in place, apply caulking around the edges to create a watertight seal. This step is essential in preventing leaks.
After the caulking cures, paint over the patch if necessary to match the original siding.
By following these steps, you’ll ensure a robust repair that not only fixes the bend but also enhances the visual appeal of your RV.
Key Takeaways:
- Clean and prepare the area before patching for optimal adhesion.
- Use epoxy for small holes; for larger ones, consider rivets or sheet metal.
- Seal edges with caulk to ensure a watertight finish.
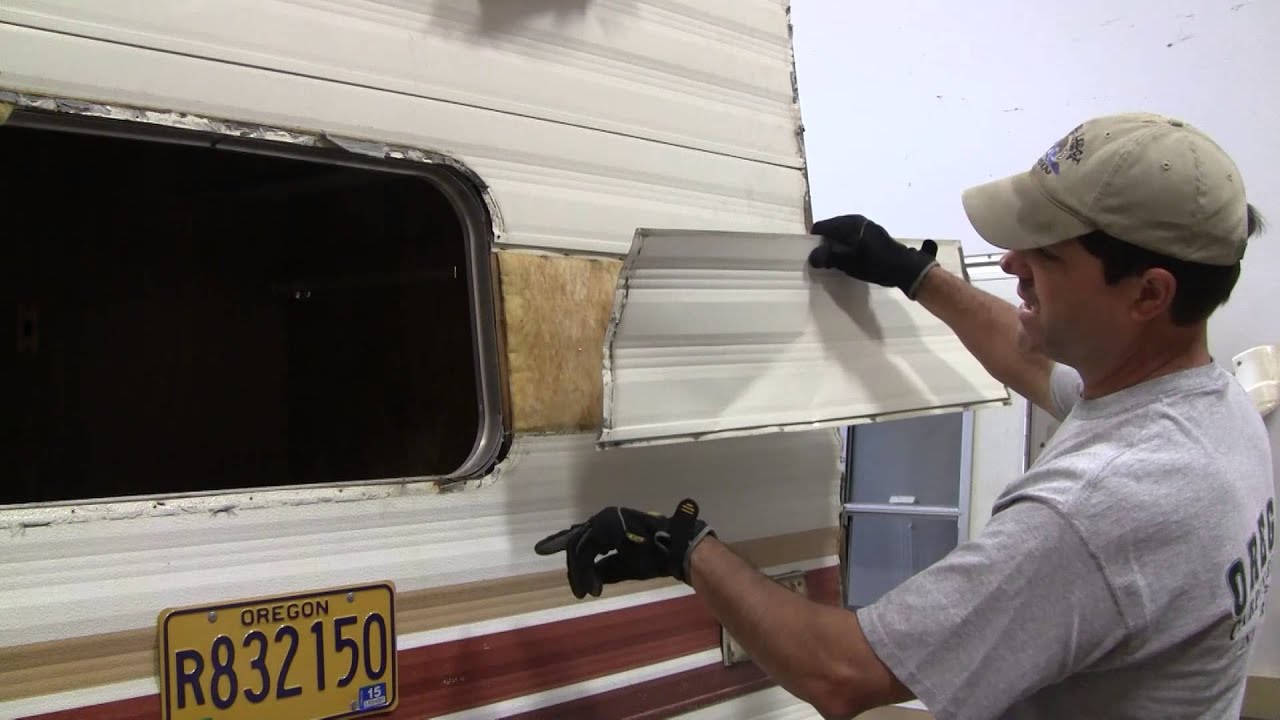
Replacing Damaged Panels: A Complete Guide
For substantial damage requiring a panel replacement, this section guides you through the process of removing the damaged siding and installing a new panel. Proper fitting, sealing edges, and matching the existing color and finish are critical factors for success.
Removing the Damaged Panel
Begin by carefully unscrewing or cutting around the perimeter of the damaged panel. Make sure to keep surrounding panels intact to maintain structural integrity.
Use the utility knife to gently cut through adhesive or caulking if necessary.
Fitting and Sealing New Panels
Once the old panel is removed, carefully measure and fit the new panel in place. Ensure that it matches the dimensions of the old one.
Once fitted, secure it with screws or rivets, ensuring it’s level and aligned correctly.
Painting and Finishing Options
After the panel is securely in place, take time to paint over if the new panel differs from the original color. Using a weather-resistant paint can help protect the new panel from wear and fading.
Each of these steps is essential for ensuring that the replacement panel not only performs well but also matches the aesthetics of the RV.
Key Takeaways:
- Carefully remove the damaged panel to avoid affecting nearby structures.
- Fit the new panel precisely for optimal sealing and alignment.
- Painting post-installation can enhance the overall appearance.
Innovative Solutions for Large Damages
Larger damages require a creative approach beyond straightforward patching. Utilizing innovative solutions not only repairs but can enhance the functionality of your RV.
This section discusses how to turn a damage into a functional feature instead of simply masking it.
Functional Upgrades
Consider integrating features that enhance usability. For instance, turning a large hole into an access point for wiring or adding a light fixture can improve functionality and appeal.
Think about incorporating additional outlets or vents as an opportunity for creative repair solutions.
Creative Cover-ups
In situations where aesthetics are a concern, using decals or artistic finishes can transform damage into a unique feature. This could include custom graphics that align with your RV’s overall design, effectively masking any imperfections.
Case Studies of Successful Innovations
Real-world examples reveal how RV owners have successfully approached larger damages. Incorporating features such as additional lighting or customized access panels have not only salvaged the appearance but have also added to the RV’s utility.
Bouncing back from large damages creatively allows RV owners to maintain their vehicle’s value while ensuring it remains practical and visually pleasing.
Key Takeaways:
- Incorporate functional upgrades to transform damage into usability.
- Creative cover-ups can enhance aesthetics and make repairs less noticeable.
- Real-life case studies showcase innovative solutions by RV owners.
Cost Analysis: Repairing vs. Replacing Aluminum Siding
Understanding the financial implications attached to repairing versus replacing aluminum siding is critical for RV owners. This section delves into various estimates from RV shops, providing insights into potential labor costs and when each option might be the best choice.
Labor Costs Breakdown
Labor costs for siding repairs can vary significantly depending on the shop and the complexity of the damage:
- Minor Repairs: Cheapest option averaging 6 hours of work.
- Moderate Repairs: Range from 8-10 hours, depending on the extent of labor.
- Major Repairs: Can require upwards of 12 hours for extensive panel replacements.
Long-Term Financial Considerations
While opting for repairs may initially seem economical, understanding long-term costs associated with ongoing repairs versus occasional replacements can direct your financial planning. Major repairs can lead to more extensive skin deterioration over time.
Benefits of DIY Repairs
Engaging in DIY repairs can significantly decrease your total expenditure. By employing basic tools and techniques, RV owners can resolve many problems without the need for professional help, leading to long-term savings.
This table presents a detailed breakdown of repair types, average labor costs, and estimated times for repairs. By comparing the financial numbers associated with minor, moderate, and major repairs, RV owners can make informed decisions that best suit their budget and needs.
Key Takeaways:
- Labor costs can vary significantly based on the repair’s complexity.
- Long-term costs should be factored into your decision to repair or replace.
- DIY repairs can be a cost-effective alternative to professional services.
Preventative Measures: Maintenance of Aluminum Siding
Once repairs are made, preventative maintenance becomes essential in preserving the condition of aluminum siding. This section explores effective maintenance methods to extend the life of your RV’s siding.
Routine Inspection Tips
Inspecting your aluminum siding regularly can help catch issues early. Look for signs of corrosion, cracks, or dents, especially after travels that may have exposed your RV to adverse conditions.
Cleaning and Maintenance Best Practices
Regular cleaning using mild detergents and a gentle brush can help maintain the appearance of your siding. Avoid harsh chemicals that may cause further damage.
Also, using a protective wax can provide a barrier against UV damage.
Long-Term Protective Measures
Consider applying protective coatings specifically designed for aluminum surfaces. These coatings can help shield from elements that may otherwise wear down the material and are available at most hardware stores.
Taking these steps can significantly prolong the life of your RV’s aluminum siding.
Key Takeaways:
- Regular inspections can identify problems before they escalate.
- Gentle cleaning routines maintain aesthetics without causing damage.
- Protective coatings can extend the life of your siding significantly.
FAQ
1. How do I know if my aluminum siding needs to be repaired or replaced?
Assess the extent of the damage. Minor issues, like small holes or dents, can typically be repaired with patches or fillers.
However, if there is extensive corrosion or multiple large holes, replacing the panel may be more effective.
Consulting with RV shops may also provide clarification on your best options.
2. What materials are best for patching aluminum siding?
The best materials for patching aluminum siding typically include epoxy adhesives for holes and sheet metal for larger damages. Using a weather-resistant caulk around the edges is also advisable to prevent water ingress and extend the longevity of the repair.
3. How much should I expect to pay for aluminum siding repairs?
The costs for aluminum siding repairs can vary widely based on the type of damage and labor. Minor repairs may cost around $300, while extensive damage requiring panel replacements can escalate to $1,200 or more.
Obtaining estimates from various RV shops can provide a clearer picture.
4. Can I prevent damage to my aluminum siding?
Yes, preventative measures such as regular inspections, cleaning, and applying protective coatings can significantly reduce wear and tear on aluminum siding. Additionally, parking under cover when possible can protect against falling debris and harsh weather conditions.
5. Is it safe to perform DIY repairs on my RV’s siding?
Performing DIY repairs is generally safe, provided you take necessary precautions. Ensure you have the right tools, wear protective equipment like gloves and goggles, and follow best practices.
If the repairs become complex, seeking professional help is recommended.
Conclusion
Repairing aluminum siding on RVs can range from simple DIY tasks to more complex panel replacements. By understanding the types of damage, evaluating costs, and considering aesthetic improvements, RV owners can take control of their siding repairs.
Armed with the right tools, knowledge, and preventative measures, the longevity and appearance of aluminum siding can be significantly improved.
Being proactive about repairs not only saves money but also enhances the overall enjoyment of traveling in your RV.