Recreational Vehicles (RVs) offer the freedom of travel while enjoying the comforts of home on the road. However, these vehicles are often equipped with complex onboard computer systems that can present a variety of operational challenges.
Statistics show that electrical problems rank as one of the top concerns for RV owners, with issues ranging from dim lights and faulty appliances to dead batteries.
Understanding these electrical malfunctions is crucial for any RV adventurer dedicated to enhancing their travel experiences.
In this comprehensive guide, we delve into the common onboard computer problems faced by RV owners, their underlying causes, and effective troubleshooting methods you can implement. Whether you are a seasoned traveler or new to RVing, this article aims to empower you with the knowledge to manage these issues effectively.
We will cover everything from basic electrical issues to more complex challenges related to converters and electronic communication units (ECUs), ensuring you can hit the open road without being derailed by technical hitches.
By familiarizing yourself with preventative maintenance practices and common problem signs, you can save time, money, and stress on your future journeys. So, let’s embark on this detailed examination of RV onboard computer problems and discover how to keep your adventures running smoothly.
Table of Contents
- Common Electrical Issues in RVs
- Understanding RV Converter Malfunctions
- Step-by-Step Troubleshooting Guide
- Resolving Water Heater Malfunctions
- What are ECU Related Problems?
- Seasonal Maintenance to Prevent Issues
- Frequently Asked Questions About RV Computer Problems
Common Electrical Issues in RVs
Electrical issues are among the most frequent complications faced by RV owners, often linked directly to their onboard computer systems. Common signs of trouble include flickering lights, malfunctioning appliances, and dead batteries.
Regular maintenance is paramount to mitigate these problems, as ignoring early warnings can lead to more severe failures, such as complete system shutdowns.
The underlying causes of electrical issues often stem from simple oversights, such as poor battery connections or faulty fuses.
Identifying Electrical Problems
To effectively identify electrical problems, keep an eye on the various indicators that your RV might present:
- Persistent dimming or flickering of lights
- Appliances that fail to turn on or produce unexpected behavior
- Frequent blown fuses
- Battery discharge warnings on the onboard display
Key Troubleshooting Steps
When facing electrical issues, consider the following troubleshooting steps:
- Check Battery Connections: Ensure that all cables and terminals are clean and securely attached. Corrosion can lead to poor connections and voltage drops.
- Inspect the Fuse Panel: Check for any blown fuses in the electrical panel and replace them as necessary. The RV typically uses standard 5, 15, and 40 amp fuses.
- Test with a Multimeter: Utilize a digital multimeter (DMM) to measure voltage at various points, helping to pinpoint the root cause of issues. Ensure that voltage levels are within acceptable ranges.
Preventive Maintenance Tips
A proactive maintenance approach will serve you well. Here are some preventive steps:
- Regularly clean battery terminals to prevent corrosion.
- Check wiring and connectors routinely to ensure they are intact and free of wear.
- Perform routine checks of fuses and replacements proactively, even without visible signs of wear.
The above table outlines some of the most common electrical issues RV owners may encounter. Being able to diagnose these symptoms effectively could save considerable time and expense during your travels.
For instance, regularly cleaning your battery terminals and performing routine inspections are crucial measures that can prevent minor issues from evolving into major electrical failures.
If unaddressed, these problems could lead to debilitating malfunctions, leaving you stranded far from services.
- Dim lights can often signal battery discharge or connection issues.
- Routine inspections of battery connections and fuses can help prevent electrical troubles.
- Proactive maintenance is crucial for averting costly repairs and ensuring your RV operates smoothly.
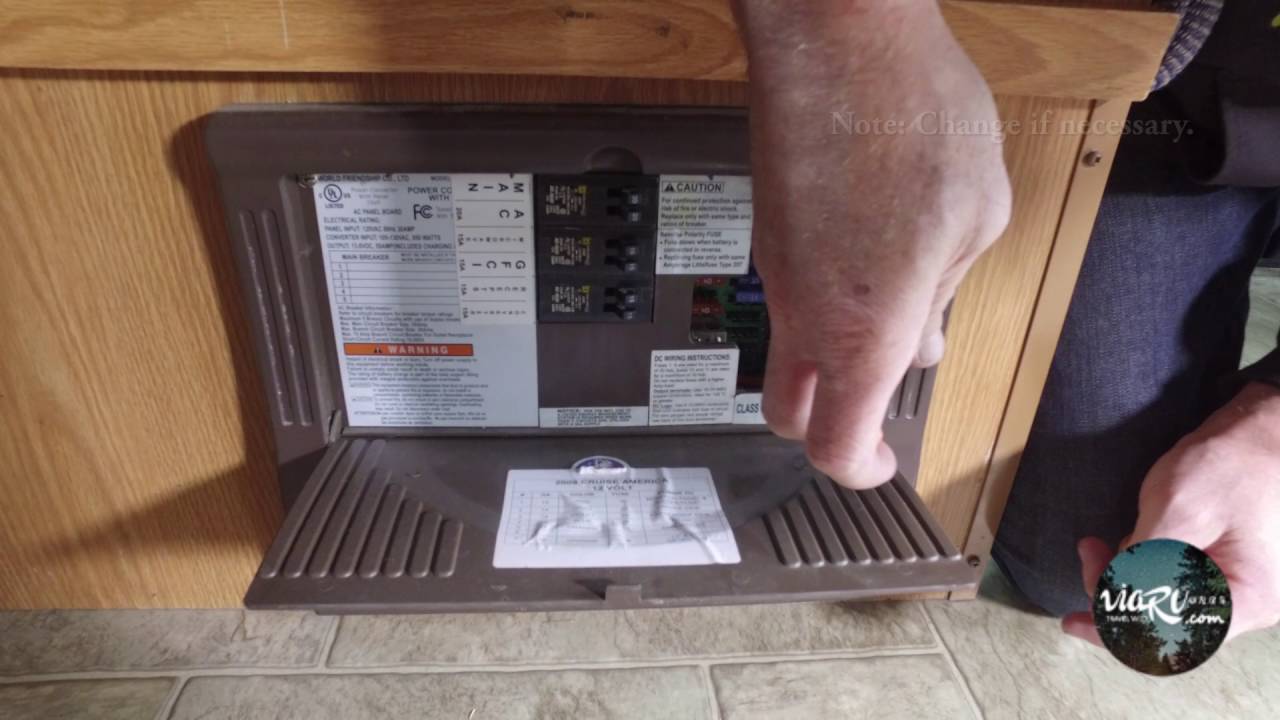
Understanding RV Converter Malfunctions
The RV converter is a critical component responsible for transforming 120-volt AC power into 12-volt DC power for onboard systems. Recognizing the signs of a malfunctioning converter is essential for maintaining electrical efficiency.
Common indicators include flickering lights, an inability for the battery to hold a charge, and appliances that fail to function correctly.
Understanding these symptoms can empower RV owners to act promptly, preventing further complications from emerging.
Signs of a Failing Converter
Identifying a failing converter involves watching for various symptoms:
- Abnormal flickering or dimming of lights.
- Failure of appliances to operate or losing power rapidly.
- Batteries that do not hold a proper charge.
Testing the RV Converter
Diagnosis requires systematic testing:
- Disconnect Power: To begin your tests, disconnect all power sources including the engine, inverter, and generator.
- Measure Battery Voltage: Use a digital multimeter (DMM) to ensure that the battery voltage is between 12.3 and 12.9 volts.
- Test Converter Output: Connect the DMM to the DC distribution panel and confirm the converter is functioning by measuring the voltage.
The table above provides a structured pathway for RV owners to assess and diagnose their converters. For instance, if the voltage measurements fall below the acceptable range, it could indicate a failing battery or converter requiring immediate attention.
By being aware of exactly what to test and the expected results, RV owners can effectively troubleshoot and resolve issues associated with their converters, ultimately leading to a smoother RV ownership experience.
- Signs of converter failure can include appliances not working and abnormal light behavior.
- Regular testing of your converter can prevent catastrophic electrical failures when on the road.
- Using a DMM for voltage measurement can help identify issues before they escalate into bigger problems.
Step-by-Step Troubleshooting Guide
Troubleshooting RV computer systems might seem intimidating, but adopting a structured method can alleviate the complexity. Start the process by isolating the problem to either the AC or DC systems.
Keeping proper documentation of each issue encountered will also provide substantial clarity and aid during evaluations.
Here’s how to approach troubleshooting effectively:
Initial Diagnostics
Begin troubleshooting by checking the following components systematically:
- Inspect Circuit Breakers: Ensure all breakers are in working condition.
- Examine Fuses: Check for blown fuses and replace if necessary.
- Tighten all battery connections: Loose connections can lead to operational issues.
In-Depth Testing Techniques
Once the initial diagnostics are completed, perform further assessments:
- Utilize Technical Equipment: Employ a digital multimeter for precise voltage readings at various points throughout your electrical system.
- Component Testing: Individually test components like the converter and appliances to isolate failures.
- Check Wiring: Inspect all wiring for wear or damage, which could indicate where power loss may occur.
When to Call in Professionals
There will be instances where DIY troubleshooting may not be sufficient. Seek professional help in scenarios such as:
- Identifying complex ECU issues that require specialized diagnostics.
- Dealing with persistent problems that do not resolve with standard fixes.
- Electrical modifications or installations that require compliance with safety and regulatory standards.
- Start with simple diagnostics; often the solution is straightforward.
- More sophisticated issues like ECU problems may require expert help.
- An organized troubleshooting process can prevent costly mistakes.
Resolving Water Heater Malfunctions
The onboard water heater is an essential component of any RV, allowing for hot showers and heated water for cooking. Water heater malfunctions can lead to uncomfortable or even impossible living conditions while out on the road.
Common symptoms of issues with the Dometic RV water heater include unable to heat water, strange noises, and the pilot light not staying on.
Addressing these faults promptly can restore necessary hot water functionality.
Identifying Heating Issues
To diagnose water heater issues, start by observing the following:
- Is the heater receiving power?
- Are there any visible leaks around connections?
- Does the pilot light stay on?
Voltage and Component Testing
Consider using a multimeter to measure voltage and conduct thorough component testing, such as:
- Check the heating element: Measure resistance to ensure it’s functioning properly.
- Examine the thermostat: Ensure it’s set and operating effectively within the necessary temperature range.
The table above provides a structured approach to troubleshooting Dometic RV water heaters. Understanding how to identify potential heating issues may enable RV owners to rectify malfunctions efficiently.
For example, if the heating element shows no resistance, replacement is critical, as failing to do so could result in ongoing discomfort and repairs during a trip.
- Regular checks on the water heater’s functionality can prevent cold showers.
- Testing components systematically provides a clear pathway to identify issues.
- DIY intervention often suffices, but do not hesitate to call an expert for persistent problems.
What are ECU Related Problems?
The Electronic Control Unit (ECU) is a crucial part of modern RVs, managing various electronic systems including engine performance, transmission, and emissions control. Problems with the ECU can manifest in multiple ways, such as engine stalls, warning lights illuminating on the dashboard, or even performance lags.
Understanding ECU-related problems can help RV owners maintain vehicle reliability.
Symptoms of ECU Problems
Common symptoms indicating potential ECU issues include:
- Inconsistent engine operation with irregular stalling.
- Fuel efficiency drops and poor acceleration.
- Warning lights, especially the check engine light.
Common Causes of ECU Malfunctions
The root causes of ECU problems broadly include:
- Communication Failures: Faulty wiring or corroded connectors often disrupt information flow between the ECU and sensors.
- Sensor Malfunctions: Faulty readings from critical components such as the mass air flow sensor can lead to incorrect ECU commands.
- Software Glitches: Outdated firmware may cause operational inconsistencies.
- ECUs play critical roles in vehicle stability and performance; monitoring associated symptoms is vital.
- Regular import updates and thorough inspections can greatly reduce ECU communication failures.
- Seek professional help for complex ECU issues beyond basic user fixes.
Seasonal Maintenance to Prevent Issues
Preventative maintenance is essential for avoiding onboard computer failures and electrical issues in RVs. Seasonal maintenance allows RV owners to identify potential challenges before they escalate and ensures the continuous reliability of their systems.
Understanding a rigorous maintenance schedule can not only prolong the lifespan of RV components but also enhance overall performance.
Maintenance Checklist
Ensure comprehensive checks per season by maintaining the following checklist:
- Battery Health: Perform voltage checks and ensure clean connections.
- Electrical System Inspection: Review wiring, fuses, and connections for signs of wear.
- Water Heater Checks: Regularly test the functionality and inspect for leaks.
Importance of Regular Inspections
Conducting regular inspections permits owners to catch issues before they worsen. Here’s why they matter:
- Identifying Potential Failures: Early detection can prevent significant repair costs down the line.
- Ensuring Operational Safety: Regular checks assure all systems are go before embarking on long journeys.
Seasonal Tips for RV Owners
Implement additional seasonal tips to enhance RV durability:
- Store your RV in climate-controlled conditions during winter months.
- Use protective covers for advanced sun and weather exposure.
- Regularly run systems both while parked and travelling to keep components in good condition.
This table categorizes vital seasonal maintenance tasks necessary for preserving the functionality of RV systems. Regular battery maintenance, electrical inspections, and water heater checks provide measurable benefits, enhancing the overall reliability and reducing potential travel disturbances, ensuring that RV trips remain enjoyable and safe.
- Implementing a seasonal maintenance schedule can prevent future issues.
- Regular inspections keep you informed about system health, contributing to safer travels.
- Follow best practices for each system to maximize efficiency and lifespan.
Frequently Asked Questions About RV Computer Problems
What should I do if my RV’s lights start flickering?
Flickering lights can be a sign of poor battery connections, a failing converter, or other electrical issues. Start by inspecting the battery connections for corrosion and ensuring they are securely tightened.
If the problem persists, check the fuse panel for blown fuses and test the voltage levels using a digital multimeter (DMM) to identify the root cause.
Regular maintenance can prevent such issues from occurring in the first place.
How do I know if my RV converter is malfunctioning?
Signs of a malfunctioning RV converter include insufficient power to appliances, dimming lights, or the inability of the battery to hold a charge. To diagnose, disconnect all powering sources, inspect fuses and wiring, and use a multimeter to measure the voltage from the converter.
If it falls outside the required range, replacement or repair may be necessary.
How often should I perform maintenance on my RV’s electrical system?
It is advisable to conduct routine checks on your RV electrical system every three months and before embarking on any significant trips. Regular checks can involve inspecting battery health, testing the converter, and assessing the fuse panels to ensure every part is functioning as intended.
Can I repair my RV’s ECU myself?
While some simple ECU troubleshooting steps can be performed by an experienced DIY enthusiast, most ECU problems require specialized software and equipment for diagnosis and repair. It is recommended to consult professional technicians when dealing with complex ECU issues to ensure optimal performance and compliance with safety standards.
What is the most common cause of RV water heater failures?
Common causes of water heater failures in RVs include faulty heating elements, thermostat malfunctions, or lack of power supply. Regular inspection and testing with a multimeter can help identify these issues early on, allowing for timely repairs and restoring hot water functionality.
Conclusion
Understanding and addressing RV onboard computer problems significantly enhances the overall travel experience. By familiarizing yourself with common electrical issues, converter malfunctions, and the importance of routine inspections, you can prevent minor concerns from escalating into costly repairs.
This guide has equipped you with the necessary information to troubleshoot effectively, leading to smoother and more enjoyable RV travels.
With the right knowledge and practices, you can embrace your adventures with confidence and peace of mind. Happy travels!